24/05/2023
The process of plastic injection moulding
Many items we use on a daily basis are made out of plastic. Without plastic, the world would be a very different place. From cars to plumbing parts, household utensils and medical equipment, they all involve plastic somewhere along the lines. But exactly how are plastic items made?
What is plastic injection moulding?
Known for its high quality and reliable performance, injection moulding is one of the most popular manufacturing processes to produce plastic parts. Not only can you produce components quickly, but in large volumes for maximum efficiency.
Plus, once the initial mould is created the price per part is very low. This makes it the ideal manufacturing process for producing thousands of identical parts.
How does it work?
Put simply, the injection moulding process consists of melting plastic pellets and injecting them into a mould to set. Sounds straightforward, but throughout this process there are many specific parameters that need to be controlled, including the plastic material, temperature, injection pressure and mould tool.
Here’s a step by step guide to how the injection mould process works:
Step 1
Before the process begins, it’s important to select the right raw plastic, typically this will be a thermoplastic. Thermoplastics are the most commonly used plastics in the injection moulding industry. They all have different characteristics but the end component will dictate the type that can be used. Common thermoplastics are Nylons, Polycarbonate, Polypropylene and Acrylonitrile-Butadiene-Styrene (ABS).
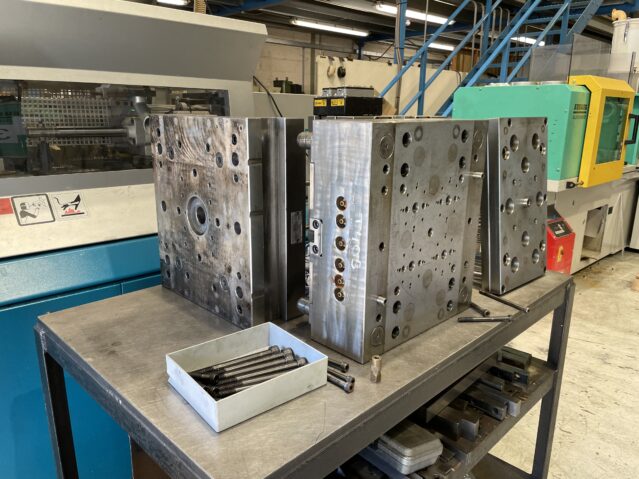
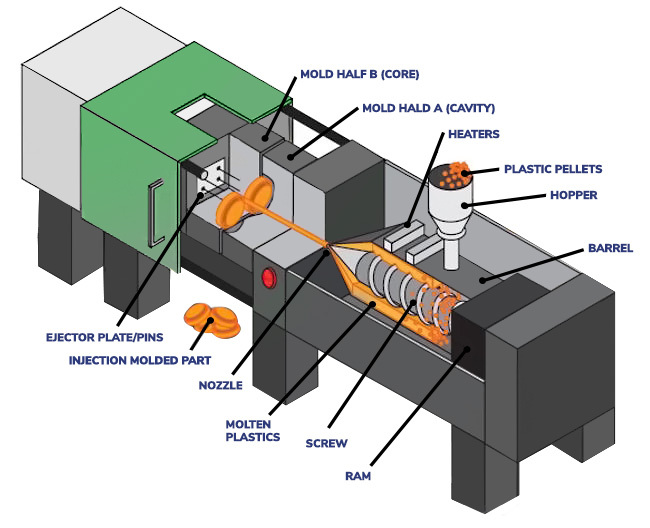
Alongside this, a suitable injection mould tool is needed to create the plastic part. The mould is made up of two halves, the core and the cavity. A tool can have a single cavity or multiple cavities to either create identical parts in each cavity or unique parts that require different shapes.
Step 2
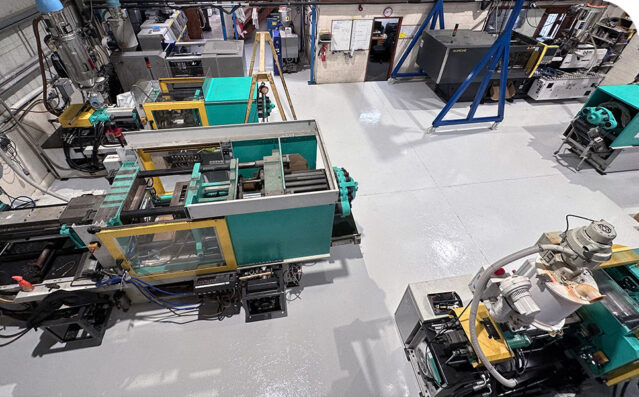
First, the tool is loaded into the plastic injection moulding press. The plastic pellets are then fed into the hopper where they can be let down into the barrel. Within the barrel is a screw that propels the pellets forwards towards the nozzle whilst heat is being applied to melt them. During this process, it’s vital that the right temperature is maintained to ensure the final part is formed accurately.
Step 3
The molten thermoplastic is then injected into the mould and held together under pressure for a set period of time. Meanwhile the manufacturer monitors this pressure and temperature to make sure the parts are produced consistently.
Step 4
After the holding time is up, the pressure is released and the part is cooled. Once solidified, the component is then ejected ready for packing or secondary operations, such as removing excess plastic. The plastic parts can then be distributed to customers.
How much does injection moulding cost?
The cost of production depends on the plastic component that is being made and if you already have a mould tool. A high percentage of the cost lies with the mould tool, potentially several thousand pounds, but once this has been manufactured the price of producing each part can be less than a few pence per piece. This makes it a very cost effective method for mass producing identical parts consistently and to a high standard.
Are you looking to create plastic parts through injection moulding? We provide a complete injection moulding service, from assisting with product design to make a part mouldable to creating the mould tools and manufacturing the plastic parts. With over 50 years experience of injection moulding for a variety of different industries, we provide a tailored service according to your individual needs. Get in touch today by filling out our contact form or calling 01953885294 to speak to one of our injection moulding specialists.